
2. Configuring the Secondary Network Controller
There are two ethernet ports on the carrier board. The one on the right is your WAN port, the one on the left is LAN. This is just defined in software and can be changed later, but I’d advise leaving it as it is to ensure you don’t accidentally open any security holes while shuffling zone policies.
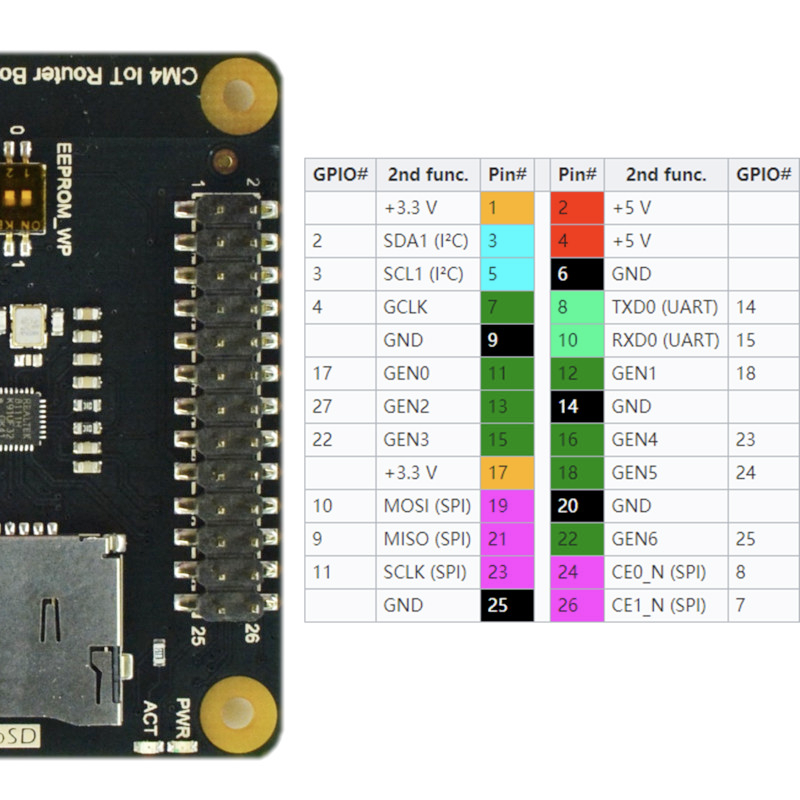
Grab your USB to UART tool and connect it to pins 6/8/10 on the carrier board:
Pull up your serial console with a baud rate of 115200 (I typically use GNU screen, like screen /dev/tty.usbserial-0001 115200) and you should have a root shell available. You may want to change the root password as that’ll serve for both SSH and web login, which is just a call to the passwd command.
After that you need to enable the USB bus, which is where the secondary NIC is attached and is disabled by default on CM4 boards. To do that, vim /boot/config.txt, press shift+G to go all the way to the bottom, press o to start a new line in insert mode, and then put in dtoverlay=dwc2,dr_mode=host. Press esc to go back to command mode, then hold down shift and press z twice to save and close the file. Run the reboot command and your system should reboot with the secondary NIC enabled.
To install the drivers, open up a root shell on the device again and run opkg update (to download the available package list) and then opkg install kmod-r8169 to get the kernel module installed for the NIC. Run reboot one more time and it should be ready to go.